Submitting a Support Ticket
Open a support ticket from your profile menu, describe the issue, attach files, and follow the conversation in the ticket's comment thread. The Flamel team typically replies within 1 to 3 business days.
One ticket, one thread
Everything you send and every reply you get back lives in the ticket. There is no separate inbox to check.
1. Open the Support Page
Click your profile picture at the bottom of the left sidebar, then click Support.
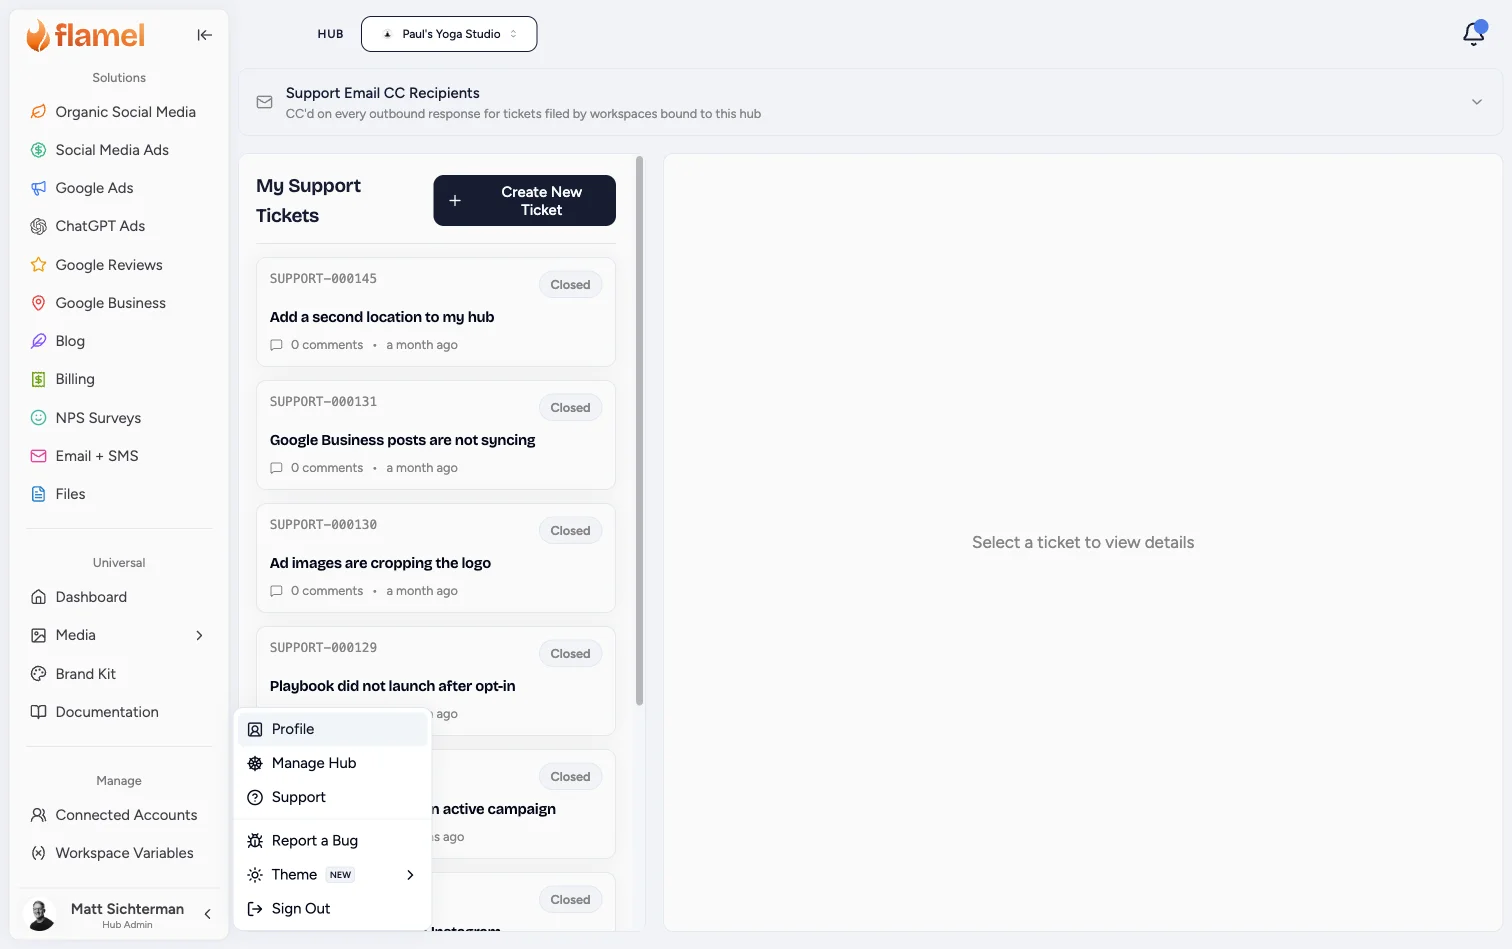
Report a Bug in the same menu opens the identical form. Use whichever you prefer.
2. Create the Ticket
Click Create New Ticket, then fill in the form:
- Subject: a short summary, like "Posts not publishing to Instagram" (5 characters minimum).
- Description: what you were doing, what happened instead, and the exact error text if you saw one (20 characters minimum).
- Attachments (optional): up to 5 files, 50MB total. Images, videos, PDFs, and documents.
Then click Submit Support Request.
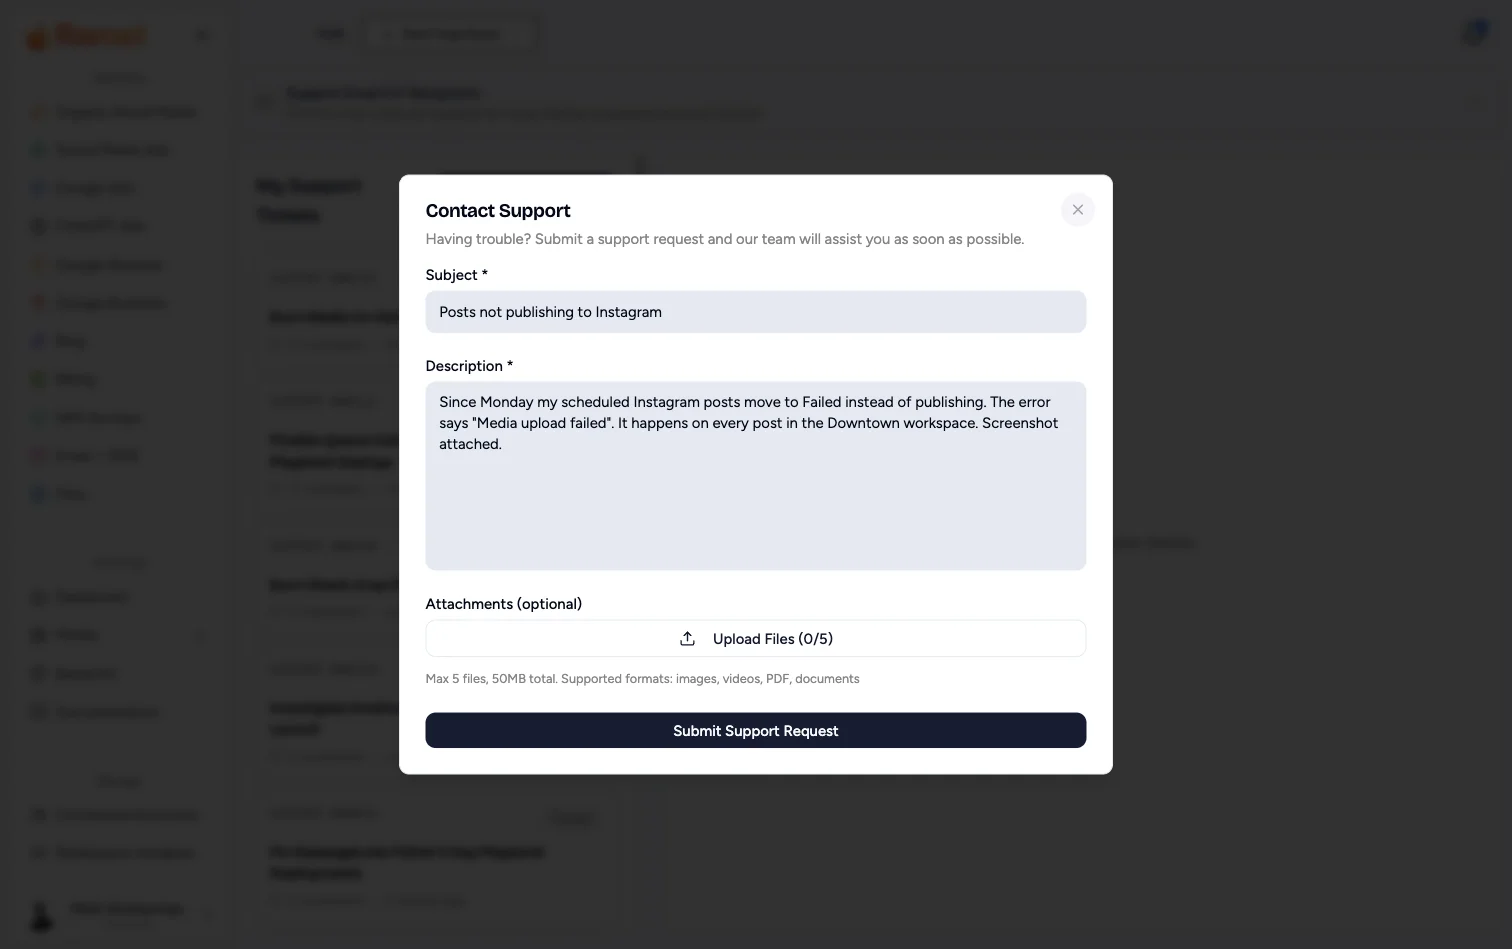
Paste the exact error
Error codes and exact wording get you a fix far faster than a general description.
3. Track It and Reply
Your ticket appears at the top of My Support Tickets. Click it to read the description, see your attachments, and follow the conversation.
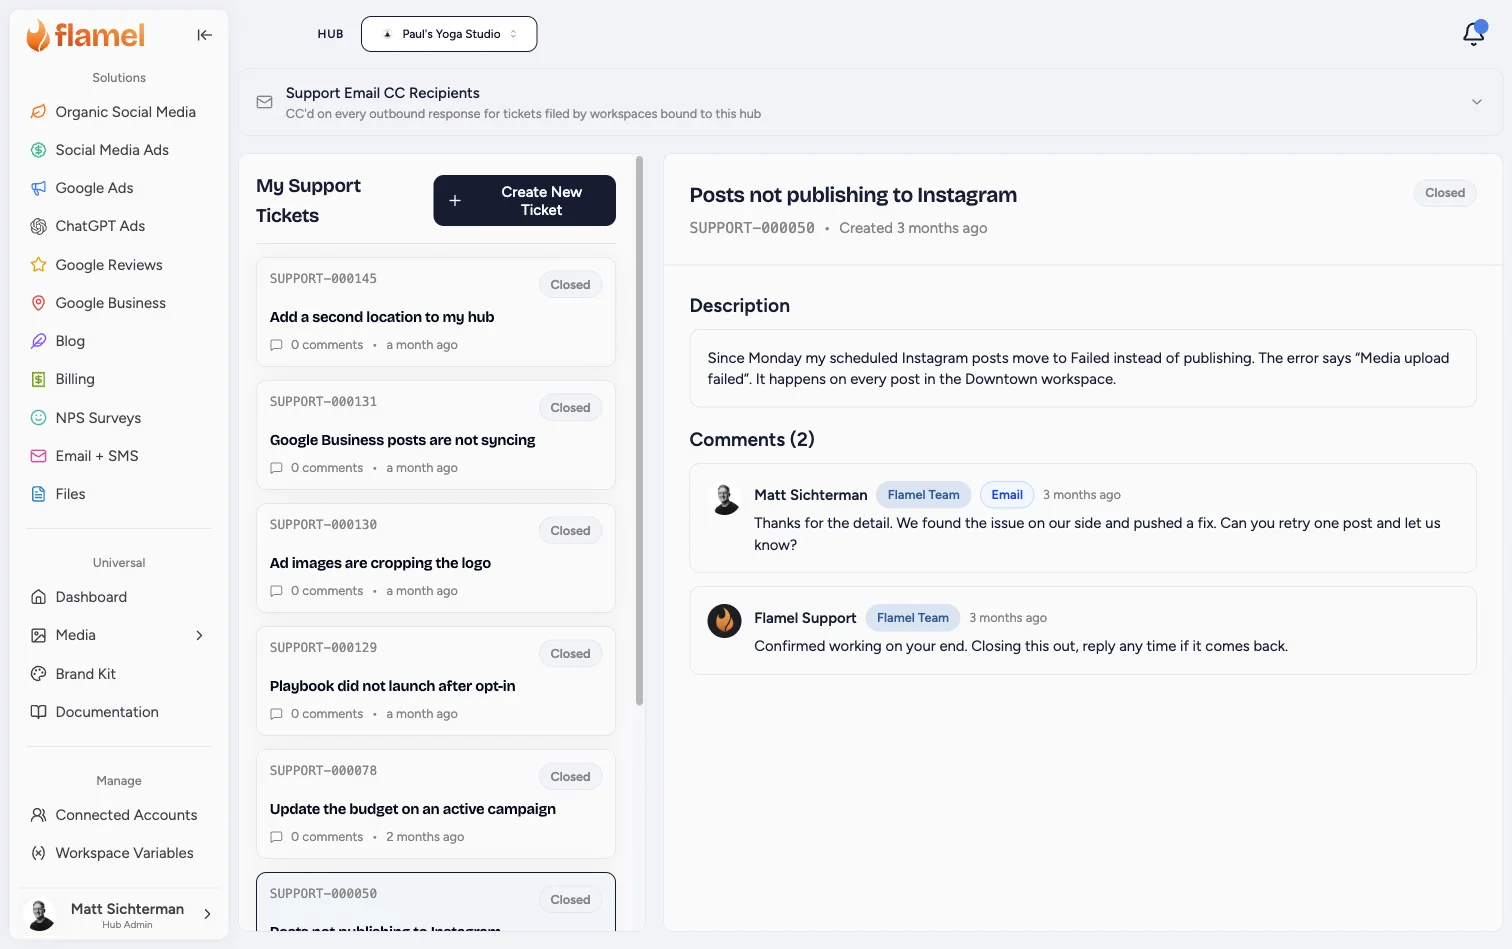
The Flamel team typically responds within 1 to 3 business days. Replies show a Flamel Team badge. To reply, scroll to Comments, type in the Add a comment box, and click Add Comment.
Statuses:
- Open: not started yet. You can still click Edit to change the subject or description.
- In Progress: someone on the team is working on it.
- Closed: your request is complete. Comments are locked, but the full history stays in your list.
After a ticket is closed
Closed tickets cannot be reopened from the app. If the issue comes back or something related comes up, open a new ticket and reference the old ticket number so we have the history. If you received a closure email, replying to that email also reopens the ticket.
CC Additional Recipients
For Hub Admins
Only hub admins see this panel.
Hub admins can copy other people on support ticket activity for the hub, so the right person stays in the loop without opening every ticket.
Expand Support Email CC Recipients at the top of the support page, type an email address, and click Add. Everyone listed is CC'd on every outbound support email sent to users of workspaces bound to this hub.
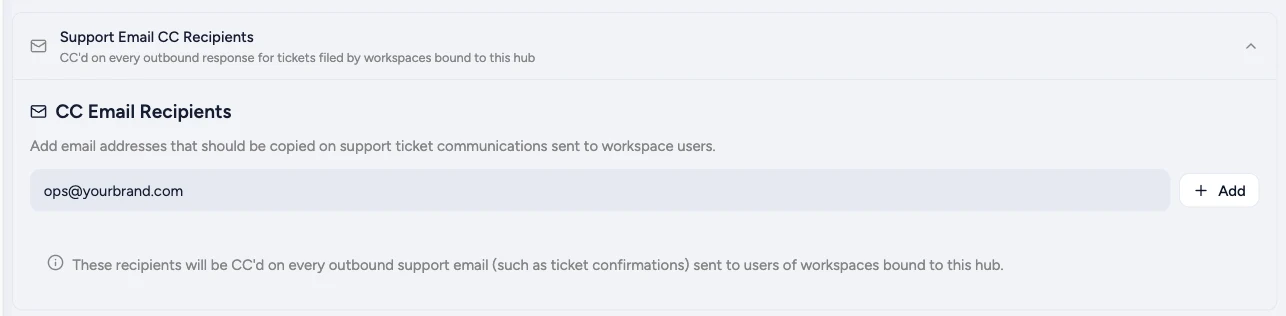
You can also manage these from Notification Settings in the notifications bell at the top right of the app.