Ad Configuration - Hub setup
Create audience types and configure the network-wide targeting baseline.
Before you start
This setup is for Hub admins. Workspaces need their Meta ad accounts connected before you configure their Ad Configuration row.
Ad Configuration is where you define the targeting baseline every campaign in your network inherits, plus the audience types workspaces choose between. Set it up once at the Hub level, then fine-tune per workspace.
Set up your Ad Configuration
Open Ad Configuration
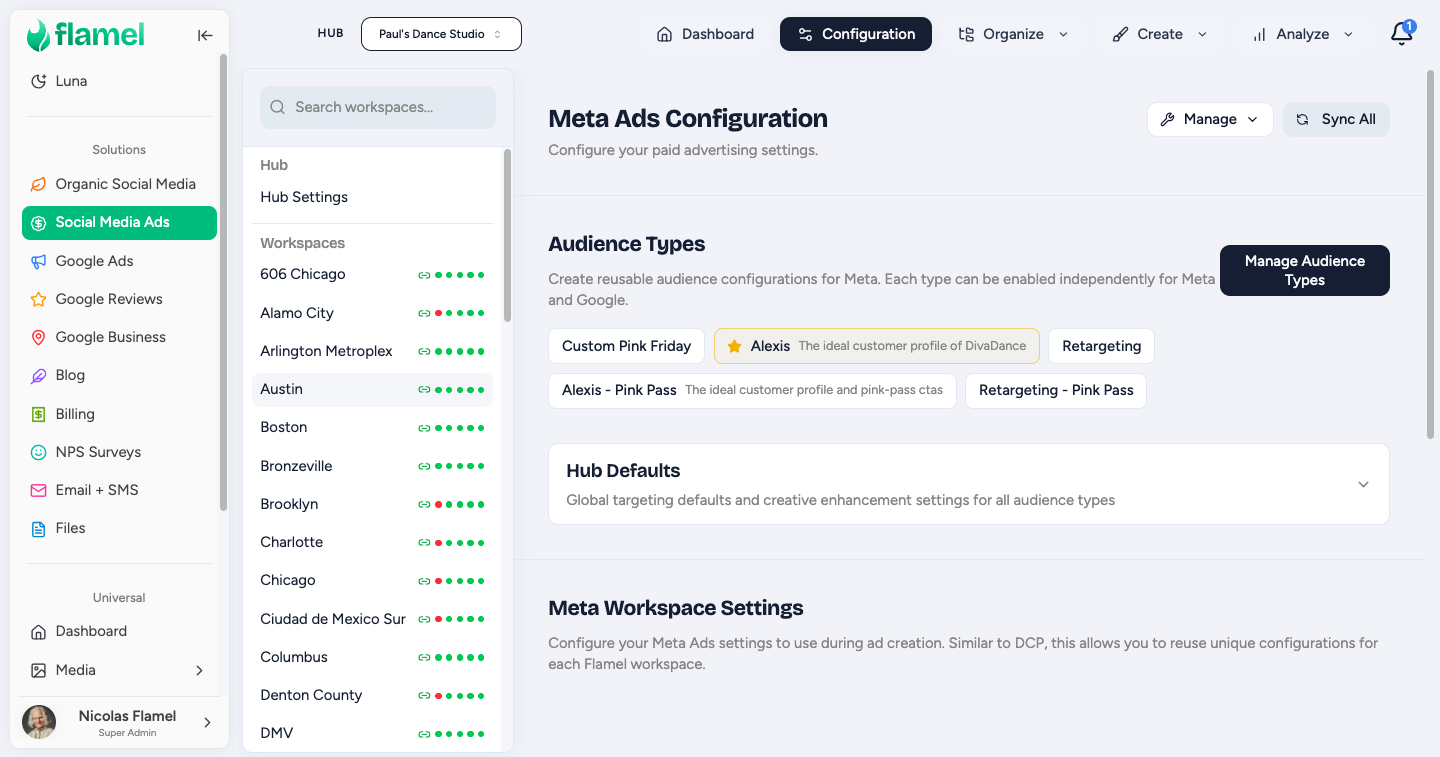
Go to Paid Social Ads > Organize > Ads Configuration, or click the gear icon next to the workspace selector.
Create the audience types you will use
Click the + next to the audience tabs. Name them by strategy (for example Database, Mass, Lookalike), not generically (avoid Type 1, Test). Add a one-line description that workspaces will see when they pick an audience.
Start with 2 to 3 audience types
Each audience type multiplies the configuration work for every workspace. Creating 8 or more slows everyone down. Begin with 2 to 3 and add more only when a real strategy needs them.
Configure the Default tab
The Default tab sets the baseline targeting that every campaign inherits unless an audience type overrides it. Fill in each section:
- Demographics: age range (keep it wide, do not over-narrow) and gender.
- Custom Audiences: any network-level audiences you maintain.
- Languages: locale targeting.
- Advanced Targeting: interests and behaviors, only if they are part of your strategy.
- Custom Locations: latitude and longitude with a radius for each workspace.
- Call to Action: default landing page URL plus display URL.
- Lead Capture: default lead form and Messenger template.
Keep the Default age range wide
The Default age range constrains every campaign in the network. Set it wide here, then narrow it per audience type where a tighter range makes sense.
Configure each audience type
For each audience tab, override only the fields that should differ from Default. Any field you leave empty inherits the Default value. Typical overrides:
- Database: a custom audience built from your customer CRM upload.
- Mass: no audience filter, for broad reach.
- Lookalike: a 1 to 3 percent lookalike built from customers.
- Retargeting: a pixel-based custom audience.
Set the per-workspace Ad Configuration
For each workspace, complete the location, audience, URL, and lead-form rows. This is the main onboarding step for new franchisees:
- Open the workspace row in the Ad Configuration table.
- Set the workspace location (latitude and longitude with a radius, or a named custom location).
- Choose the audience type the workspace should run.
- Enter the landing page URL and display URL for the workspace.
- Select the lead form (or Messenger template) the workspace will use.
- Save the row and confirm the values appear in the table.
Verify the green status dot
Each tab shows a green dot when location targeting is configured and a red dot when it is missing. Red means campaigns will not deploy, so fix every red tab before going live.
A red dot blocks deployment
The most common cause of a red dot is skipped Custom Locations. No location means campaigns fail to deploy. Treat the red dot as your pre-launch warning and clear it first.
Advantage+ Audience
Advantage+ is Meta's AI-driven targeting. Use the guidance below to decide when to enable it.
Enable Advantage+ when:
- The campaign objective is conversions.
- You want Meta to expand beyond your defined audiences.
- You are testing new markets or demographics.
Skip Advantage+ when:
- You have strict geographic requirements.
- The campaign is a special category (housing, credit, employment), which is compliance restricted.
- You have very small, well-defined audiences you do not want to dilute.
Call to Action fallback order
When a campaign needs a Call to Action, Flamel resolves it in this order:
- The audience type CTA, if one is set.
- The Default tab CTA.
- The Hub-level default.
Workspaces only need to set their CTA once on the Default tab. Audience types inherit it automatically unless you override it on a specific tab.
Common mistakes to avoid
- Generic audience names. Workspaces see names like
Type 1orTest. Use strategy names instead. - Over-narrowing the Default age range. It constrains every campaign. Set it wide, then narrow per audience type.
- Skipping Custom Locations. No location means campaigns fail to deploy. The red dot is the warning.
- Creating 8 or more audience types. Each one multiplies workspace configuration work. Start with 2 to 3.