Onboard a New Workspace
Add a new franchise workspace from the Hub page, invite the owner, connect accounts, and set variables and ad configuration.
For Hub Admins
Use this workflow whenever a new location joins your network. Plan for about 20 minutes.
Before You Start
Gather the following:
- Franchisee's full name and email address
- Location name as it should appear in marketing (for example,
Brand Name - City) - Business address, phone number, and hours
Hub Admin Setup
Add the Workspace
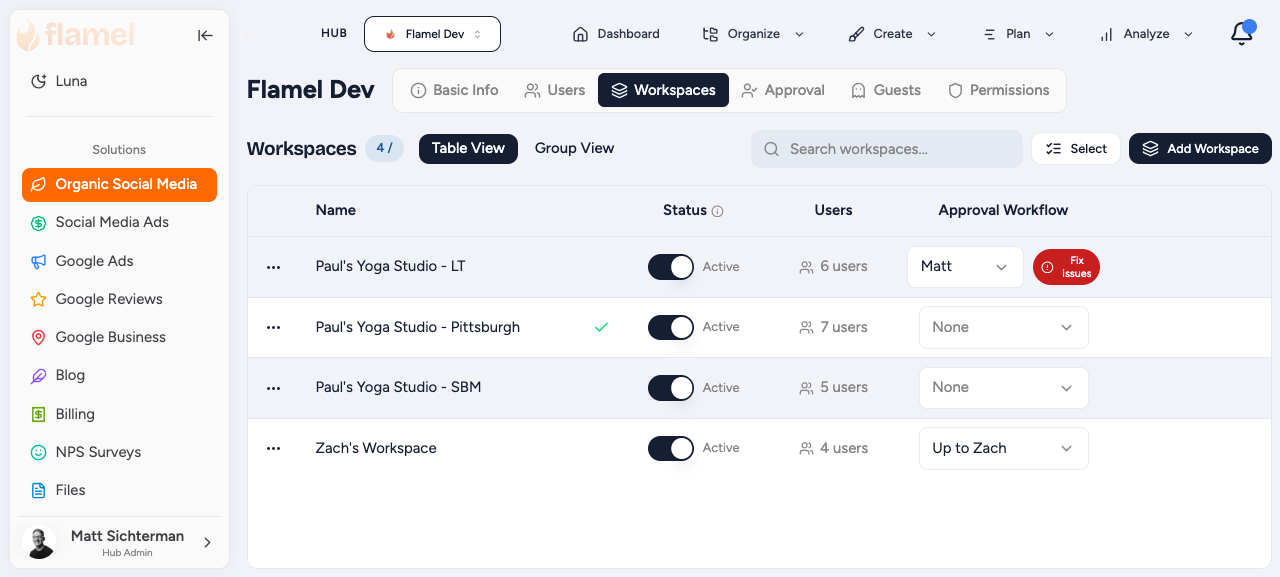
- Click your Profile Picture in the bottom left corner
- Go to Manage Hub > Workspaces.
- Click Add Workspace in the top right.
- Enter the workspace's name, details, and hours, then save.
The counter at the top (for example, 10 / 20 Workspaces Used) shows how many workspaces your plan allows. Add workspaces yourself anytime up to that limit; reach out if you need it raised.
Add the Workspace Owner
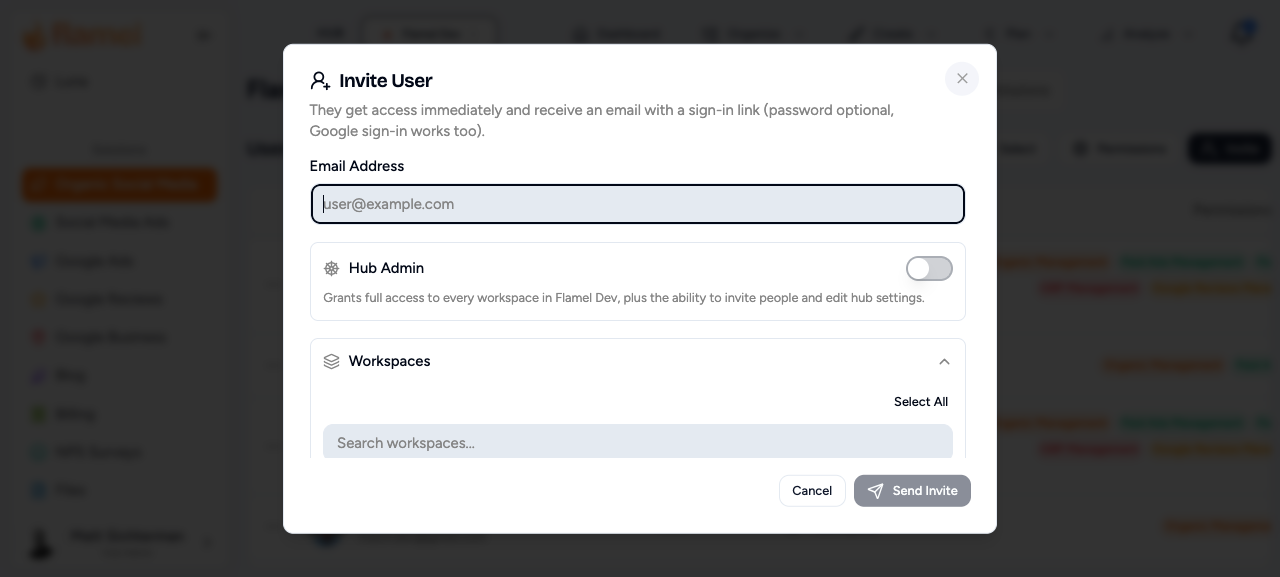
- Go to Manage Hub > Users and click Invite User.
- Enter the franchisee's email address.
- Leave Hub Admin off (this is a location user, not a hub admin), then select the new workspace under Workspaces.
- Send the invitation.
The franchisee receives an email invitation to access Flamel.
Connect Social Accounts (Optional)
If your solution uses social accounts, connect them now or let the workspace owner do it later.
- Switch into the workspace.
- Open Connected Accounts and connect the required platforms.
- Confirm each account shows an active connection.
Set Up Ad Configuration (Optional)
If your hub runs Paid Social Ads, configure the workspace's targeting so playbooks deploy with the right settings. Connect the Meta ad account first.
- Switch into the workspace.
- Open Paid Social Ads > Ad Configuration.
- Set audience types, locations, radius, website URL, and lead form.
- Confirm the workspace shows as ready to launch.
Full reference: Ad Configuration.
Set Workspace Variables (Optional)
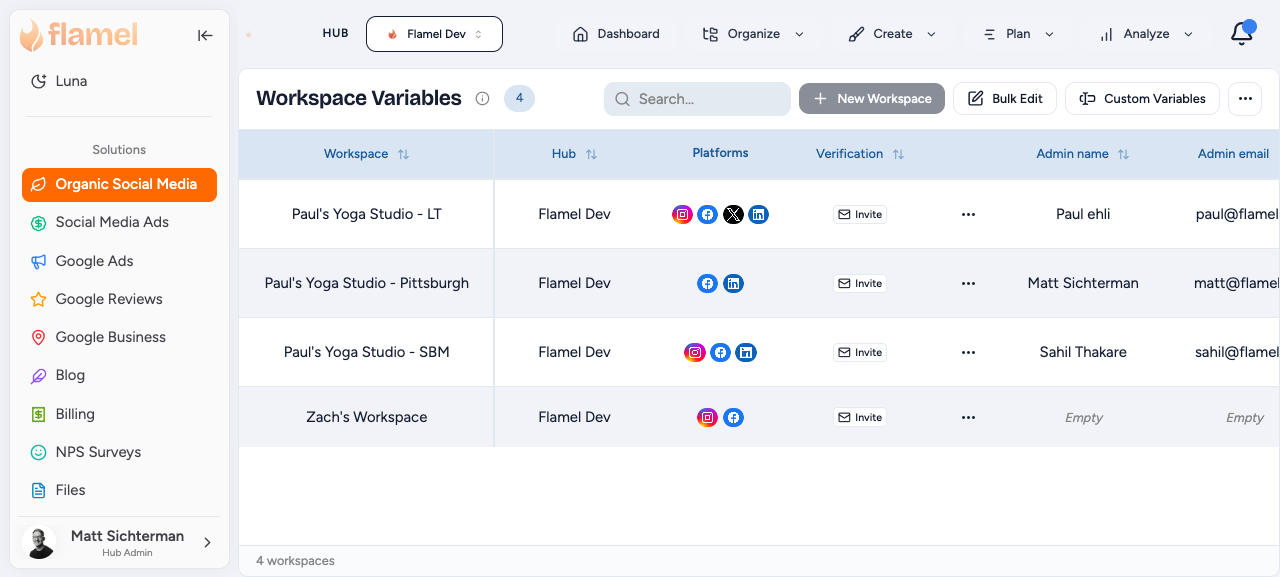
Workspace Variables, plus any Custom Variables your hub has defined, fill in automatically when content is generated, so each location's copy uses the right name, address, phone, and brand details.
- Open Workspace Variables from the sidebar and select the workspace.
- Fill in the standard fields and any Custom Variables used in your templates.
- Save.
Full reference: Custom Variables.
Verify Setup
Before completing onboarding, confirm:
- Workspace created
- Workspace owner invited
- Social accounts connected (if applicable)
- Ad Configuration completed (if using Paid Social Ads)
- Workspace Variables completed
- Franchisee can access Flamel
Once complete, the workspace is ready to use.
Related Articles
The full multi-location workflow for running a franchise network.
Brand-specific fields that personalize content per workspace.
Connect social media accounts to a workspace.
Set audience types, targeting, locations, and lead forms for paid ads.
Invite and manage workspace users.